%20-%20ee9c0.gif)
Have you noticed that everything that surrounds us is imperfect? Have you appreciated the beauty of the “perfect imperfection”?
Imperfections are part of our world, and their random nature, from subtleties to exaggerations, is what makes everything unique.
In the CG world, we have the possibility to recreate everything! However, creating these effects is overwhelming as either you don’t know how to properly do it because you are just starting in the 3D universe, or you know good enough that to create such effects you will need to spend quite a lot of hours doing the whole actual process and trying and failing (x many times) until you achieve your desired look. And then, repeat the process in the next project.
But what if you can do it with just the magic of a slider? Or even better, without UV mapping or baking!
After years of facing this situation and working on many projects where we spent hours doing these effects, we wanted to create and bring you the ultimate solution.
“Smart Weathering” will let you add weathering effects to the shaders you have already done in your scene in order to add those imperfections that make a render more realistic, and add extra level of detail with Geometry nodes effects!
A very intuitive, compact, powerful, and versatile solution loaded with the most usual weathering effects to let you focus on the artistic aspect of your project and save a lot of time!
No more excuses to keep postponing that old project you had in your mind anymore! (?
Boost anything of your current scene. The “Smart Weathering” tool will let you add an extensive amount of effects carefully created.
It mainly started as a shader effect but we are now experimenting with geometry nodes and other add-on tools that will enhance your workflow.
Apply effects ranging from very exaggerated ones like dirt and scratches on the edges to more subtle ones like fingerprints, smudges, wetness, and dust!
Give a backstory to your projects in a matter of seconds!
Easily create new texturing styles and explore many more design iterations in much less time.
Just play with intuitive sliders and the effects will adapt to the shape, size, and rotation of your object and create a unique procedural output.
Designed to be as simple as possible.
This tool has been designed for you to only concentrate on the artistic side of your project.
Beginners and advanced users will really enjoy using this solution. You will not need to spend more time doing complicated shader setups!
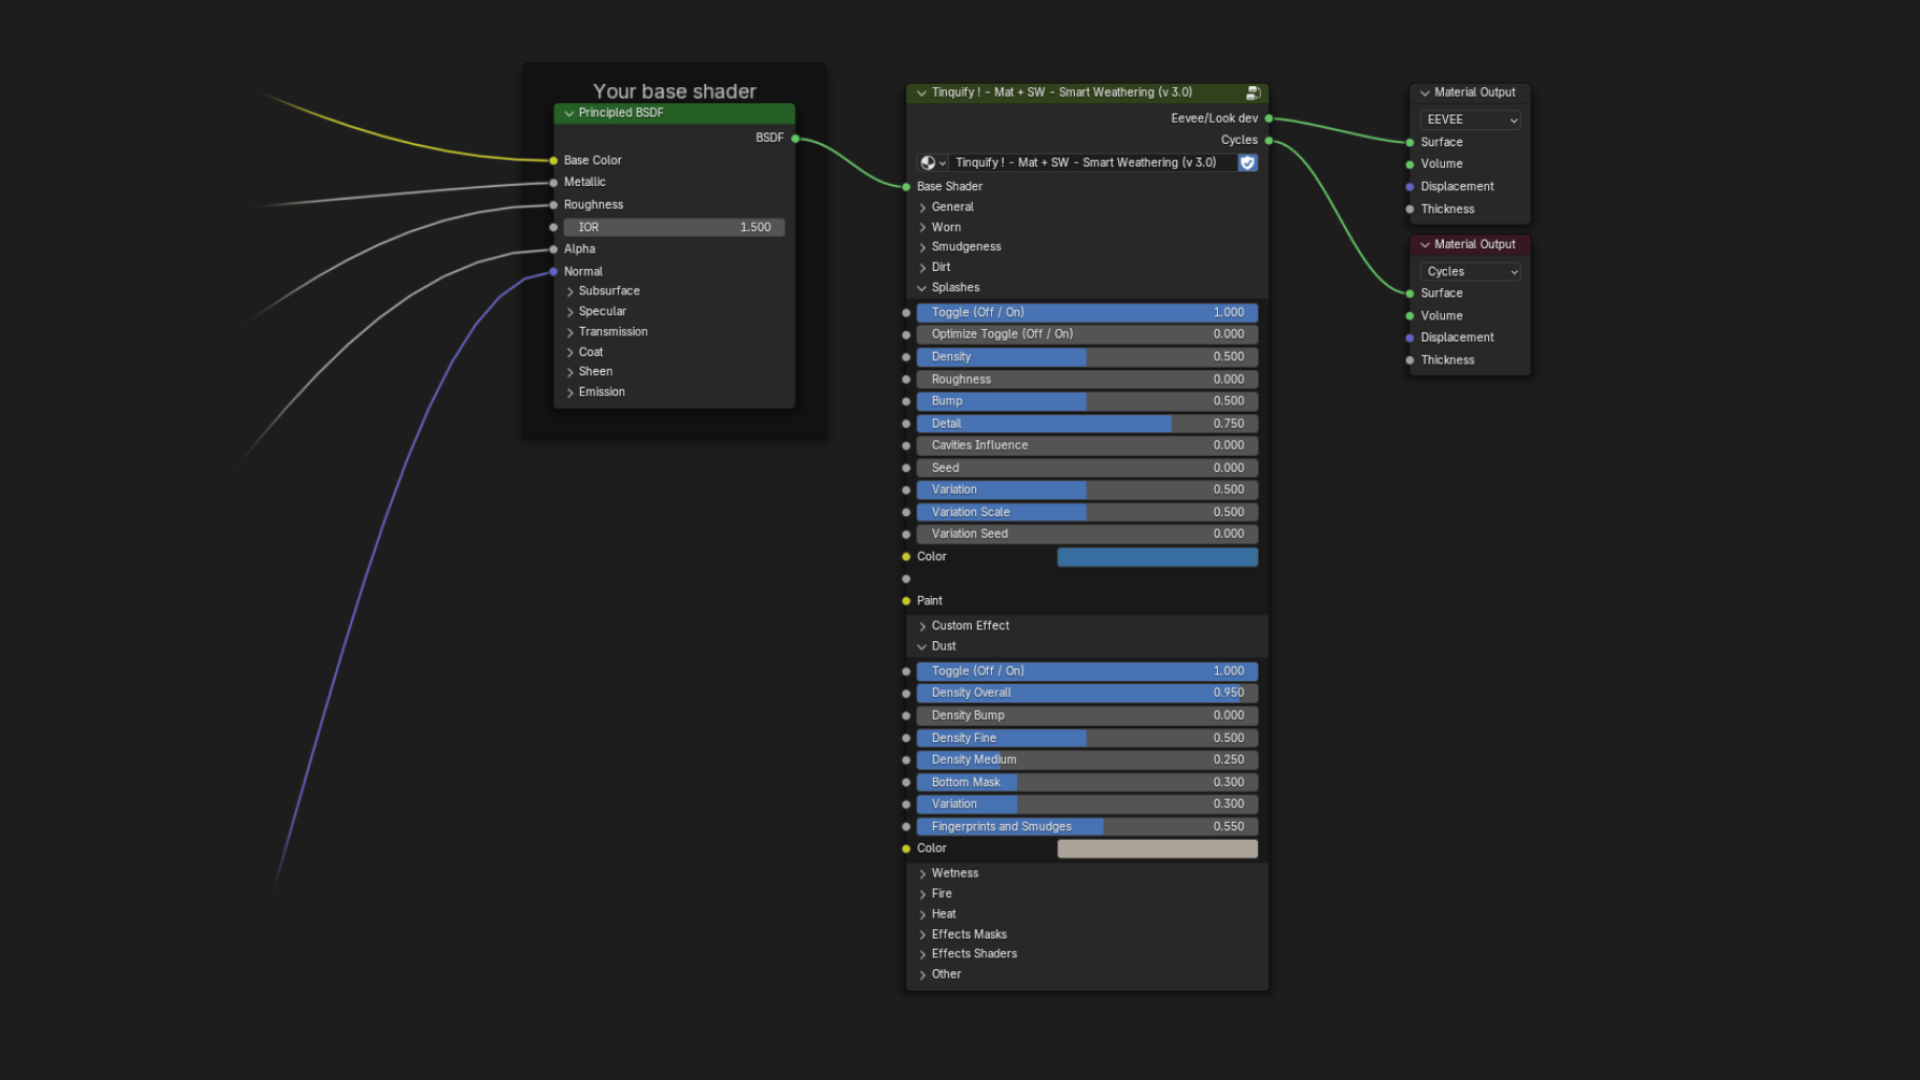
You will need to simply click on “Add” and a single node with intuitive sliders will pop up. This single and powerful nodegroup is all that is needed.
There are no complicated terms to understand. Parameters are named as intuitive as possible and are organized in sections.
You will have great add-on utilities at your fingertips to easily add it to your base shader, remove it from them, copy and paste setups, hide and show it, or isolate it. This will facilitate the workflow even more.
Also, our custom node UI will let you easily see and enable effects, randomize them, and show the effects masks to focus your work on.
%202%20-%209673c.gif)
You can of course model directly in Blender but for this example, we wanted to push it a bit further showing a workflow where you can be modeling in Plasticity and taking a real-time preview in Blender.
Current texturing methods require a lot of time and steps to move from the modeling to the texturing phase of your project. Normally, you would need at least a few hours to start texturing your model.
And that is hoping that “there will not be any more modifications to the model” (something we know that it is almost never the case…)
Sounds like magic, doesn’t it? Smart Weathering takes advantage of a series of information about the object (Procedural nodes, Objects’ size and Cavities, and so on) and applies the procedurally generated textures without the need for UVs.
You will be able to see the texturing result as you are modeling! This lets you have an extremely smooth workflow as it updates in real-time. If you make changes to your model the effects will readapt to them.
No need to redo any baking process or rework the UVs.
%20-%2002921.gif)
You can see here you can hide all the SW layers of all the shaders with a few clicks, and enable the one you want to focus on.
Smart Weathering will let you add single or multiple layered effects in a non-destructive manner.
All the effects are completely separated from your base shader**.** This workflow will let you keep your base shader intact and explore different artistic style iterations without the need to worry about your previous material setup.
At any point, if the effect is not going as desired, you will be able to separate the Smart Weathering effects pass and go back to your base shader, start playing again with the default values, or use your saved presets.
From subtle effects to very worn materials. And from little objects to large-scale ones.
You will have a wide variety of very common-use effects selected for you to play with. Check the list of examples below to see it in more detail.
Each of them was carefully created using all the experience we gained through the years to let you play with the sliders without the need for you to worry about the technical aspect.
There are many that offer procedural materials, but we ensure to make them the most realistic and have the best performance at the same time.
All the effects were created as light as possible to have maximum efficiency.
And you will not need to guess values. The effects are created using real-world measurements as references for the different effects such as the size of a dust particle, the diameter of a fingerprint, the size of a water drop, and so on.
Hand-paint the details you want to complement the procedural effects created. An unwrapped 3d model will be needed for this option to work.
As these effects are created procedurally, this implies a list of many benefits. Here are some of the highlights:
%202%20-%20da450.gif)
A single material will output multiple visual results per object. This is because a unique SW seed will be created for each object.
Yes, no matter if they share the same material or even if they are instanced.
You can have an unbeatable efficient workflow.
No need to spend time looking for the right texture to use.
You will have an extreme amount of control over the weathering produced by just playing with a few sliders.
There is no chance to set the effects “wrong”. The default values of the effects will give you a realistic output, you don’t need to touch every slider to get the look you need (usually it is a matter of a few ones) and any value of the sliders will give you a realistic result. It is only a matter of taste!
Almost all the sliders are meant to be used by just sliding them from 0 to 1. The different values in between will just make the effect change progressively.
Textures are great but you may have to deal with tiling issues or their resolution may not be enough.
This is not the case for procedural setups like ours.
Each effect contained in the setup can be animated as you can see in our video!
This is something that would be very difficult (or even impossible) to achieve with current texturing methods.
With a large amount of parameters, the combinations are limitless.
Lighter file size and less memory consumption.
SW node is much lighter (just a few MB instead of all the 4k or 8k textures that can be a couple of hundreds of MB per set).
Here you can see some of the main features our addon has
%20-%202e915.gif)
Select the objects you want to apply to it with a set of convenient tools, and then apply the SW layer or remove it with a few clicks.
%20-%201645b.gif)
Save a lot of time copying & pasting, or saving with presets.
Usually, getting the desired look procedurally takes quite a lot of time of experimentation and high technical skill. And doing it for each project is even a lot more.
Even though you can replicate the same effect that we are offering you in this setup, it is practically a nightmare when you want to copy these effects you created to a new shader setup you have.
However, with our node setup, you will achieve this by just pressing literally two buttons.
You will not need to replicate effects again for each material. Once you get the desired look, you will be able to easily copy it and paste it to other shaders, or reuse it.
Get a view of the SW sliders in a convenient interface that will let you easily see which effects are applied, randomize them, and see their mask.
Save the combinations of the Smart Weathering node that you like the most to reuse them in different projects, to share with your SW friend, or maybe even sell them.
Powered with a preview and filtering system that will let you find the combination that will suit better in your next creation.
%20-%204bdc5.gif)